Table of Contents
Login Pages - Settings
Introduction
- To fine-tune the behavior of a login page you need to edit its settings.
- Rather than go through each item on the Settings tab, most of which are self-explanatory, we will cover the more difficult items and the places where you need a heads up
Theme
- The default theme is called Default and redirects you to the Bootstrap 5 page.
- There is a special theme called Custom that allows you to specify your own URLs to redirect to.
- There are also a number of predefined themes. If you select one of these themes, you will be redirected to the older Webix-style login pages.
- The items in the dropdown list are defined in the DynamicLogin.php file in /var/www/html/cake3/rd_cake/config/DynamicLogin.php.
- One of the ideas around the login pages is to have a common login page URL for the captive portal e.g. https://cloud.radiusdesk.com/cake3/rd_cake/dynamic-details/chilli-browser-detect/
- The CakePHP Controller will then determine:
- Which login page to display, based on the value of Theme.
- Which language to display on the page depends on the default language selected for the login page.
Slideshow
- If you have added multiple photos, you can use the slideshow function.
- The duration per slide can be fine-tuned by editing the settings of the photo.
- You can also force the slideshow to be viewed so that the login screen pop-up only appears after the specified time has elapsed.
Automatically add a suffix
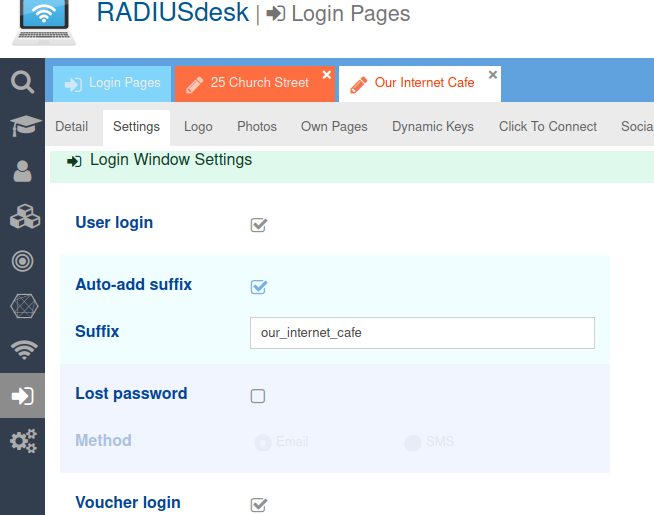
- This function is useful for sites where a permanent user registers by entering their email address and password.
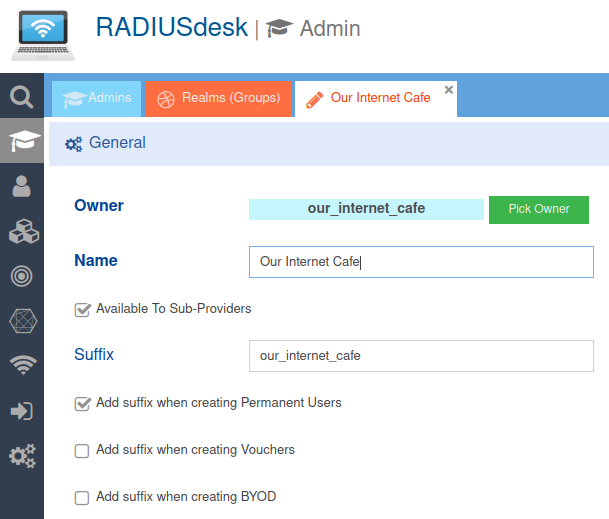
- When the permanent user is created (provided the settings on the realm are so), a suffix is added.
- This will give you a username like dirk@gmail.com@our_internet_cafe.
- If you specify the auto-add suffix as our_internet_cafe, this value is automatically appended to the user name specified by the user.
- He then only has to remember his email address and the password he has chosen.
Sending Email
- There are two places where the system can send the user an email via a login page.
- The lost password option.
- The User registration option.
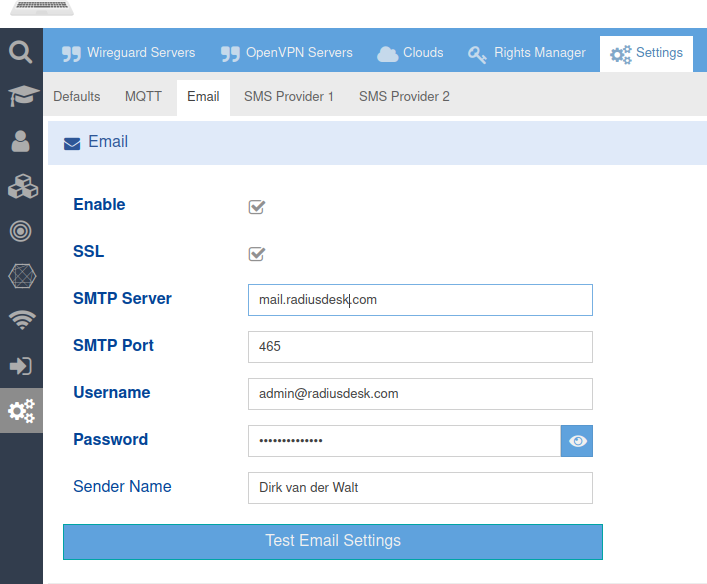
- Remember that you must first configure the system with valid email settings for this to work.
T&C URL
- You can specify a URL for T&C
- Remember, if this URL is on a different server, you will need to include an entry in the Captive Portal walled garden for the user to reach this URL.
Show usage
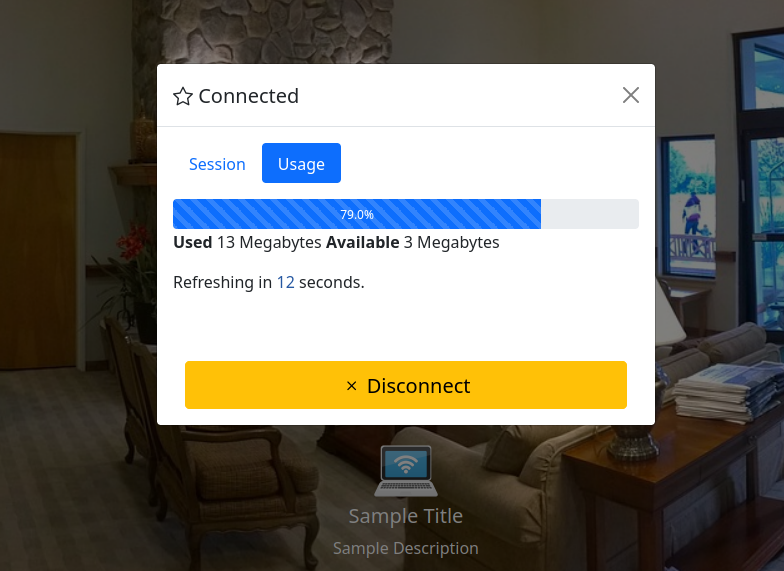
- There is an option that allows the page to show usage to a user after they have connected.
- This is handy for a voucher based system or a system that uses permanent users with top-ups.
Support for Arabic
- Support for Arabic is now also included.
- However, there is one small change you should make to make the system work optimally.
- Edit the page /var/www/html/login/bootstrap5/index.html.
- Remove the default Bootstrap 5 stylesheet.
<!--Comment the line below out if you are planning to implement languages including Arabic-->
<!--<link href="css/bootstrap.min.css" rel="stylesheet">-->
- Activate the inclusion of it in JavaScript (at the bottom of the index.html page)
if(i18n == 'ar_AR'){
    $('#htmlMain').attr('dir','rtl');
    $('#htmlMain').attr('lang','ar');
    //RTL Stylesheet
    $('<link/>', {
       rel: 'stylesheet',
       type: 'text/css',
       href: 'css/bootstrap.rtl.min.css'
    }).appendTo('head');
}else{
    //Normal Stylesheet (if you have commented out the normal Bootstrap stylesheet - activate this section for non-Arabic languages

    $('<link/>', {
       rel: 'stylesheet',
       type: 'text/css',
       href: 'css/bootstrap.min.css'
    }).appendTo('head');

}
- This tweak allows RTL and normal stylesheet to coexist, so you can output pages in Arabic and other languages.
- If you do not perform this tweak, RTL styling will be restricted.
User Registration With Top-Up Profile
- When you enable user registration for a login page, you must specify the realm and profile to which the newly registered user will belong.
- A popular option is to choose a profile of the Data Top-Up type.
- If you choose such a profile, it is very important to assign an initial top-up value to the user in order to limit the data that the user can use.
If you do not specify an initial top-up value, the user may be able to use unlimited data.
- The file /var/www/cake3/rd_cake/src/Controller/RegisterUsersController.php contains a section that you can enable to automatically add the first top-up for you when the user registers.
- Simply change $add_topup = true; and specify the value of the first top-up
//============== SMALL HACK 26 MAY 2022 ===============
//==== USE THIS TO ADD THE INITIAL DATA / TIME FOR USER REGISTRATION WITH **TOP-UP** PROFILES ====
//=====================================================

$add_topup = true;
if($add_topup){
    $postTopupData  = [
        'user_id'           => $q_u->id, //We make the owner of the Login Page the owner or the Top-Up
        'permanent_user_id' => $responseData['data']['id'], //Permanent User who gets the Top-Up
        'type'              => 'data',  //Type (data, time or days_to_use)
        'value'             => '10', //**Change VALUE**
        'data_unit'         => 'mb', //**Change VALUE**
        'comment'           => 'User Reg First TopUp', //Comment to ID them
        'token'             => $token //Token of the Login Page owner
    ];
    $topup_add_url  = 'http://127.0.0.1/cake3/rd_cake/top-ups/add.json';
    $topup_response = $this->_add_initial_topup($topup_add_url,$postTopupData);
    $postData['top_up'] = $topup_response;
}
//-----------------------------------------------
//======== SMALL HACK 26 MAY 2022 ===============
//----------------------------------------------
CoovaChilli-specific settings
- As of June 2022, we have added two options that apply specifically to CoovaChilli-based captive portals.
- One allows you to specify whether the JSON interface should not be used (for whatever reason, e.g. because it cannot be compiled with this option)
- The other option is to use CHAP instead of PAP.
Complications with the JSON interface
- If you are serving the login page from a public server with an FQDN and want to make Ajax calls to Coova Chili's JSON interface, most modern browsers will only allow these Ajax calls over HTTPS.
- For this to work, you need to configure Coova to support HTTPS. (Port 4990)
- Not all Coova Chili instances provide this support, and the certificates required for this support to work properly make things even more complicated.
- If we specify on the login page NOT to use the JSON interface, the login page will fall back to /var/www/html/login/bootstrap5/js/sConnectSimple.js instead of /var/www/html/login/bootstrap5/js/sConnect.js to connect and disconnect the user.
- However, there is a trade-off and the session details will be missing after successful authentication.
- Use this option for devices such as the Teltonika routers.
Using CHAP instead of PAP
- Coova Chili normally uses PAP authentication..
- For this to work, it uses a UAM service with a UAM secret to encrypt the password.
- You can also choose to use CHAP and NOT use the UAM service.
- For this to work correctly, you must omit the UAM secret when configuring CoovaChilli.
If you decide to use CHAP, you should omit the UAM secret in the CoovaChilli configuration.
- For MESHdesk and APdesk, you can now also omit the UAM secret in the configuration.
- Also make sure that your MESHdesk firmware on OpenWrt is the latest one that includes this support.
- This brings us to the end of the discussion on settings.
- Be sure to check out the other wiki pages that cover other aspects of login pages.


